How-To Guides

How To Guides

Using rsync on Mac to Copy Files

Using rsync on Mac to Copy Files

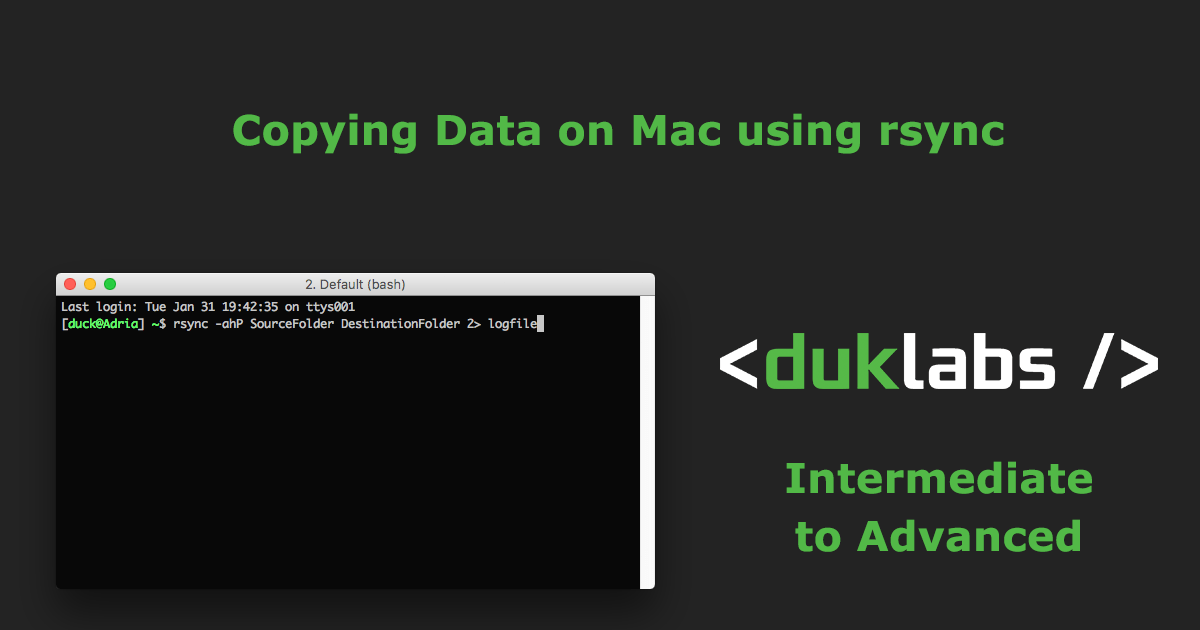
There’s a lack of good file copy utilities on Mac like there is for Windows (eg. Teracopy/Ultracopy). If I need to copy a bunch of files where I’m likely to come across errors copying, I’ll use rsync!

This guide covers how to copy files on a Mac using an external drive or any connected network drive. It’ll skip any errors and log all the failed copies to a file for you to check through. It’s especially handy for copying files while skipping errors, corrupted files and getting past some permissions errors.

This is a beginner to intermediate guide and doesn’t cover some of the more advanced features of rsync.

Continue reading →

Posted by duck in How-To Guides, 56 comments
Backups for PC

Backups for PC

If your computer got stolen, how much data would you lose?  Wedding photos, baby photos, important documents, photos of your recently deceased grandparents?

It’s vitally important that you have a backup solution ready for when disaster strikes, and one backup isn’t enough.

3-2-1 Backup

The basic principle of 3-2-1 Backup, is you have 3 copies of your data, stored on 2 different types of media and 1 of them is off site.

A good example of this is having one backup on an external hard drive at your house (local backup) and an online backup (offsite backup).

Continue reading →

Posted by duck in How-To Guides, 0 comments
Backups for Mac

Backups for Mac

If your computer got stolen, how much data would you lose?  Wedding photos, baby photos, important documents, photos of your recently deceased grandparents?

It’s vitally important that you have a backup solution ready for when disaster strikes, and one backup isn’t enough.

3-2-1 Backup

The basic principle of 3-2-1 Backup, is you have 3 copies of your data, stored on 2 different types of media and 1 of them is off site.

A good example of this is having one backup on an external hard drive at your house and an online backup.

Read more to find out about how to setup both a local and a cloud backup on a Mac!

Continue reading →

Posted by duck in How-To Guides, 0 comments

FreeBSD/FreeNAS arp multicast spam

So, my FreeNAS Server started randomly spewing my log file with this:

Dec 24 16:16:10 zoe kernel: arp: 43:05:43:05:00:00 is multicast

It was going at a rate of about 1 a second (in bursts of 5 every 10 seconds or so).
I fired up Wireshark to work out what it was, turns out it was my OpenMesh Wifi Access points sending these packets out.

Read more to see how I fixed it 🙂

Continue reading →

Posted by duck in How-To Guides, IT Issues, 3 comments

Fixing a Barcode Reader Trigger

A few years ago I bought a barcode reader for use in a school Library. It was a Cino 780BT, Bluetooth, nice base station, glorious battery. It was a really nice unit.
One slight issue: The trigger switch on them sucks.  The first one we warrantied and got a replacement, the second one developed the same fault after a year or so of use too. The first time it happened the switch had come loose from the board, so I resoldered it back on (it’s a SMD switch, so there wasn’t much holding it on).
I contacted the company, they wanted me to send it back to them to fix (and charge me for it), the switch would be $20 + labour to fit it. I figured since it was out of warranty I’d give it a shot and see if I could replace it.

I couldn’t find a decent switch to fit (I tried to repurpose a switch from a mouse, but I couldn’t get it to fit right), so I used a switch from my Mechanical Keyboard sampler kit (it has 4 different types of switches to try out to see which one you like).

So: Little bit of soldering and some hot glue later, I have a working barcode reader again!IMG_1432

Read More to see some in progress pictures!

Continue reading →

Posted by duck in Home, How-To Guides, School, 2 comments

Traffic Logging with Asus RT-N56U

UPDATES! 21/6/14: Use a different interface that does just WAN traffic and made the cron thing actually work. Scroll down for the green bits (padavans firmware only though).

I’ve spent the last few days fiddling around with network traffic monitoring on my modem so I can track downloads for each different computer on my network. This article is a how to guide and a set of notes about getting it working.
If you want to follow this guide, you will need an Asus RT-N56U or one of the similar models. You can also mostly follow this guide using any OpenWRT routers (but you will need to adjust as you go to suit your router). I initially set it up using the stock firmware on the RT-N56U, however I ran into issues where it was reporting the wrong amount of traffic. After I installed the Padavan’s Firmware, I still had the same problem (I later solved it by disabling hardware NAT below). In theory this technique should work with the stock firmware and I’ll detail it below as well as how to get Padavan’s Firmware up and running too.

The final result of this is to be able to see a screen like this:
Screen Shot 2013-12-31 at 11.49.33 am

Continue reading →

Posted by duck in Home, How-To Guides, 31 comments

MacBook Pro Retina Going to Sleep on Battery in Mavericks

I recently got myself a MacBook Pro 15″ Retina and noticed that in Mavericks they have removed the option to have separate timers for display sleep and computer sleep.  You can turn off sleep mode  when you’re running on AC power, but not when you’re running on the battery.

The problem with this is that I want the display to turn off to save battery power, but I want all my background processes (eg. Adium/Colloquy) to continue running and for it to stay connected to wifi, but when the display goes blank, it goes straight to sleep and disconnects everything!

The fix for this is to manually set the options via pmset in the terminal. To do this, you’ll need to do the following:
1.    Open Terminal (it’s in the Utilities folder under Applications)
2.    Enter the command:  sudo pmset -b sleep 0
3.    Enter the command:  sudo pmset -b standby 0

You will need to enter your password after running these commands (if it asks for it).
For more information about what this command does, check here:  https://developer.apple.com/library/mac/documentation/Darwin/Reference/ManPages/man1/pmset.1.html

Hope this helps someone 🙂

Ducky

Posted by duck in Home, How-To Guides, IT Issues, 7 comments

How to throttle Skype so it doesn’t use so much bandwidth.

I’ve done this as both a Mac and PC guide, the PC way of doing it is actually a little easier (but I use a paid program for it).
I’m on a 100mbit connection with a 720p iSight camera on my MacBook, so it uses about 500KiB/s of uploads (+ whatever the person I’m talking to is sending me back) which turns out to be something like 2gb an hour. This being said, Skype runs just fine on 50-100KiB/s.
When you turn on the speed cap thing, give it a minute or so and Skype will automatically adjust the video quality to suit the bandwidth available to it, so set your limit, then chill for a bit and see if you’re getting the quality you want

Mac
You’ll need a program called Entonnoir (it’s a free one).
Download it, and pop it in your Applications folder.
In Skype, go to Preferences and check the port number under the advanced tab.

Screen Shot 2013-11-05 at 9.05.15 am

Now, in Entonnoir, hit the + button, set the port number to the same as the one in your Skype Prefs and set your limits.

Screen Shot 2013-11-05 at 9.05.39 am

PC
I use a program called NetLimiter. It is glorious and I use it a lot for scheduling downloads (like game downloads through Origin/Steam where there’s no scheduling function built in) to run during off-peak download times.
Simply open up NetLimiter, tick the button next to Skype and enter a limit in.
If you know of a free equivalent for NetLimiter, post it in the comments!

Posted by duck in Home, How-To Guides, 0 comments

Measuring Area on a Map with Photoshop

Here’s a quick guide I wrote on how to use Photoshop to easily measure an area on a Map using Photoshop.

In this guide I’m using Photoshop CS5 for Mac, most of the concepts will be similar for the other versions.
First up: Scan your map and get it into Photoshop

Working out the Scale

1. If you’ve got a scale marker on your map, use that, otherwise you’ll need to measure a distance that you know, in this case I used a basketball court (marked as 20mx33m).
2. Use the Ruler Tool in Photoshop (hidden under the eyedropper tool) and select the distance for your scale.

3. In the ruler tool options (top of the screen usually), make sure “Use Measurement Scale” is unticked. Then look at the L1 value. Write this number down!

4. In my example I got the value 246.88px. So from this we can work out that there’s 246.88 pixels in 20 meters.
This gives us 12.344 pixels per meter and if we square it we get 152.374px per square meter.

Highlighting the Area

1. Make a new layer, and using a wonderful bright colour, paint over the area you want to calculate the size of. Make sure you set the brush to have a hardness of 100%.

2. Use the Magic Wand Selection Tool to select the area you just painted. Set the tolerance to 1 and untick Antialias and Contiguous (it should select everything you’ve painted).
3. Go to the Window Menu and bring up the Histogram. If it doesn’t have the numbers underneath it, click the drop down box in the top right hand corner of it and go to Expanded View.

4. Change the “Source” dropdown box in the Histogram window to Selected Layer and write down the number under Pixels. I got 157,529px.

Doing the math

So we know that one square meter is 152.374px and our selected area is 157,529px.
So we do some quick division: 157529/152.374 and we get 1033.83meters^2

If you used this or have any corrections, please leave a comment 🙂

Posted by duck in Home, How-To Guides, 20 comments

Papercrafting with Aluminium

Papercrafting with aluminium cans

I wanted to see if papercrafting was possible using aluminium cans (ie. Coke cans), I did a bit of a google around and there doesn’t seem to be a lot of information on the subject, so I figured I’d do some research and try a few techniques out to see what I could come up with.  I’ve split this into sections to make it a little easier to read.
If you’ve never made anything out of papercraft before, I suggest you look elsewhere Papercraft Museum and make something out of paper, it takes a significant amount of more effort (and time) to work with aluminium.

Flattening the Cans

First up, I used a knife to cut the top and bottom off the can (you can use scissors, but you’ll need to use a knife to get a start to it) and then using scissors to chop the cans into a piece I can flatten. After you’ve cut them into sheets like that, neaten the edges by using a pair of scissors to cut them straight and make sure there’s no little sharp bits.
The method for flattening the cans that I’ve found works best is to use a sandwich maker (an old one, don’t ruin your good sandwich maker!!). Before turning it on, lay down a piece of baking paper on the bottom, put about 4 cans in, then add another layer of baking paper on the top (this should help prevent at least a little bit of damage to the sandwich maker).
Hold the cans down flat as you close the lid, once you’ve done that, turn the sandwich maker on.
I haven’t fully experimented with getting the best efficiency here, but I left it on for 10 minutes with 4 cans in there, then turned it off and let it cool before I opened it.
Taadaa! Flat cans!
Other methods I have tried are:
* Ironing (Does nothing)
* Ironing and bending at the same time. This method works, but you end up with your piece looking a little bit bent as it’s hard to get it as flat as you would in a sandwich maker.
* Clamping it between 2 pieces of wood. This does absolutely nothing, if you leave it for a day or a week, they bend right back to their natural shape.
It seems like heat is very important in getting these things to stay flat.

Cutting the Sheets

I printed my design out on paper first, cut the paper version out then used it to trace onto the sheet. You may end up with pieces that’re bigger than the can, so you’ll have to deal with this by splitting it into 2 pieces.
Also, because the cans are way thicker than paper, you’ll end up with parts that will fall short because the thickness of the paper messes it up. I just dealt with it as I went and it may have resulted in a less than perfect final product, the design would probably have to be altered to give a bit of room in some corners to account for the extra thickness.
Using a knife is practically useless, you just can’t drag a knife through aluminium like you can through paper.
Scissors on the other hand are brilliant, it’s just like cutting through paper. The only issue is the end of the scissors can cause the aluminium to bend a bit. To counter this, I use a knife to piece the corners, then use the scissors to cut up to them. It’s not perfect but does the trick nicely.
You should also score the pieces using whatever you normally use to score, I use a thing that’s a bit like a needle on the end of a knife handle.
Folding is pretty simple, just do as you normally do. Be careful about bending too much though, as the metal will weaken the more you bend it!

Gluing

This part is rather difficult, I tried a whole bunch of glues to work out how to get it to stick properly, I ended up settling on Contact Cement. (Contact Cement is the sort that you apply to both surfaces, let sit for ~20minutes then push them together).
This part is going to take the majority of your time, I suggest you glue 1-2 pieces at a time, put the contact cement on them, let them sit the full 20 minutes, then push together (hold for ~10 seconds or so to make sure it’s solid) before moving onto gluing 2 more pieces. Get a movie out, play some games… It’ll take a while.
The contact cement wasn’t the greatest however, as if the metal is trying to flex against the glue, it’ll pull itself apart unless you sit there holding it for at least 30 seconds, even then it doesn’t feel as strong as one would hope.
I didn’t end up trying Epoxy however, so that would be a good thing to experiment with.
Other glues I tried:
* Aleene’s Original Tacky Glue (the metal surface was too shiny for the glue to stick once it dried). This is the glue of Papercrafting gods that I had to import from the US to Australia. It’s very similar to PVA/Wood Glue, just slightly tackier making it awesome for papercraft. Just not for… Aluminiumcraft 😛
* “Hobby Cement” – Same deal as the Tacky Glue above
* Bostik Multi Bond – Same deal as above, it just can’t stick to the metal as well as it should.

Taadaa!

And here’s my end result! Would I do it again? Nope, it took me about 3 days to get the whole thing done when the paper version took closer to a couple hours….

The design I got from: Tenpepakura Translated
And thanks to: Build Totodile  for showing me where to get it 😀

Posted by duck in Home, How-To Guides, 1 comment